How to make a storyboard and shot list for film (even if you can't draw)
For short films, music videos and ads: boxes, stick figures and arrows, shot-size shorthand, timing and aspect ratios, then a shot list sorted into shooting order. With a worked 30-second example.

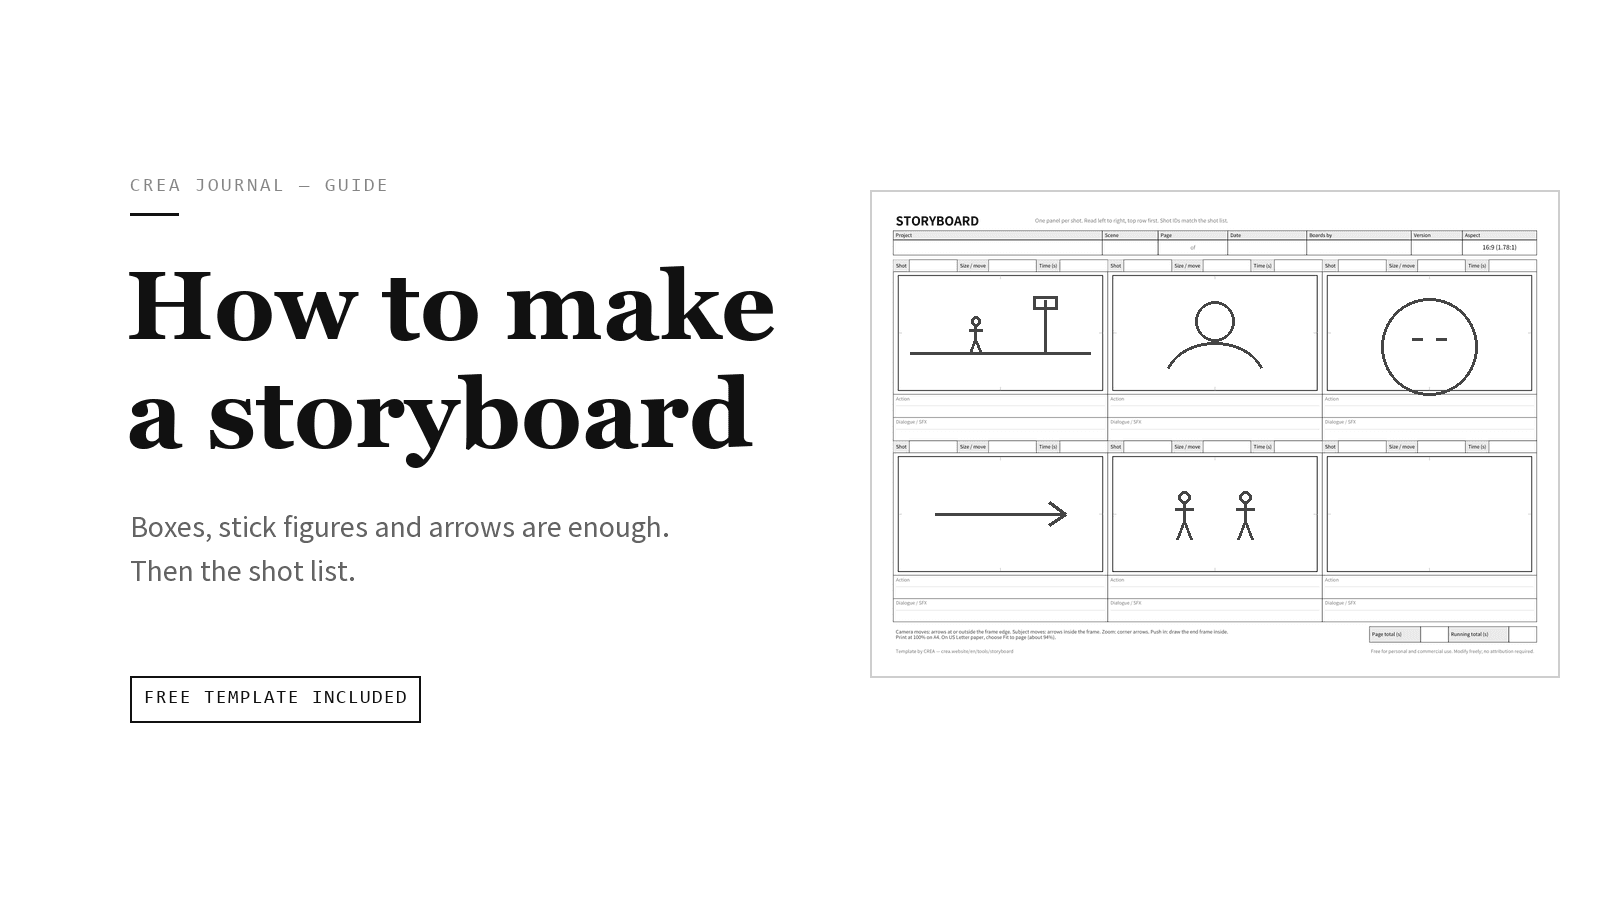
A storyboard is a set of rough pictures of the shots you plan to film, in order, with a few words under each. It is not artwork. Its job is to get the director, the crew and, on a commercial, the client picturing the same film before anyone arrives on set. A shot list is the same plan written as a table, sorted into the order you will actually shoot.
The short version
- Break each scene into shots: one panel per new framing.
- Draw each frame in the shape you'll deliver (16:9, 9:16, 2.39:1).
- Use ovals, stick figures and arrows, and label anything unclear.
- Under each frame, write the shot ID, size, move, action, dialogue and seconds.
- Add up the seconds and cut what doesn't fit.
- Copy the panels into a shot list and re-sort it into shooting order, grouped by camera direction.
A fictional 30-second example, from a short film called Last Fare (Nina, a few coins short of the bus fare, and Cal, who runs the diner), is worked through near the end.
If you only want blank sheets, they're in Free storyboard and shot list templates. For a short comparison of the two documents, see Storyboards vs shot lists.
What a storyboard is for
A board answers three questions before the shoot day:
- What does each frame look like? Where the camera is, how big the person is in frame, what is behind them.
- How do the shots cut together? Reading the panels in order is a rough edit on paper. If the story doesn't work on paper, it won't work in the edit.
- What don't we need? A shot that isn't on the board is a shot nobody has to light, rig or wait for.
You don't have to board every shot. Board the ones that are hard to explain in words: action, stunts, effects, complicated camera moves, vehicles, and the first and last images. A simple dialogue scene covered by a wide and two close-ups can go straight onto the shot list.
Break the scene into shots first
Before you draw, read the scene line by line and mark a new shot wherever the audience needs to see something new: a new place, a new speaker, a reaction, a detail (a timetable, a coin), or a camera move that changes what we see. For a dialogue scene, the usual minimum is a wide shot that covers the whole scene (the master) plus a closer shot of each speaker.
Number the shots in story order, scene number plus a letter (2A, 2B, 2C), and write one action line for each. That numbered list is your panel count; drawing comes second. With no script, as on many music videos and ads, do the same with the song or the brief: one line per moment.
How a storyboard sheet is laid out
There is no single standard layout. Most printable sheets use one of two:
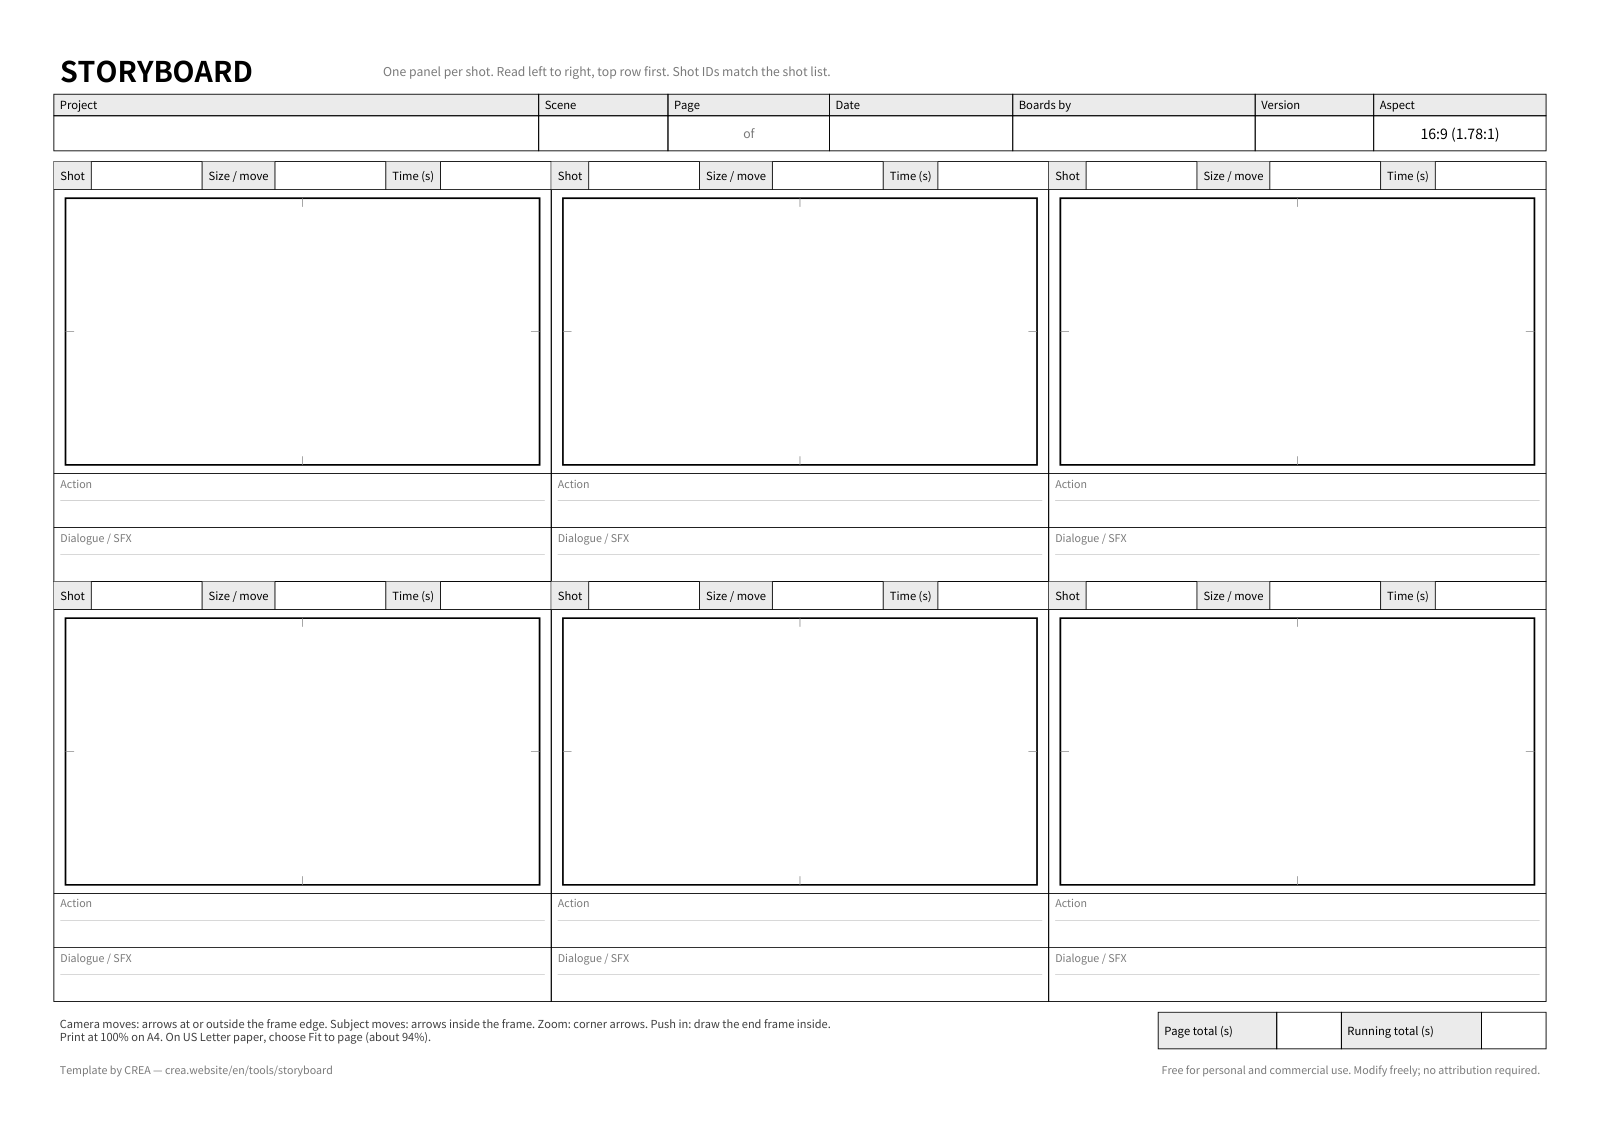
- Grid layout. Frames in rows (for 16:9, often three across and two down on a landscape page) with a few writing lines under each frame.
- Column layout. A narrow shot-number column, then the frames stacked down a portrait page, then columns for action, dialogue and time. It's common in Japanese film and animation, and it suits people who can't draw: the words carry the meaning and the frame only shows composition.
Whatever the layout, put the project title, scene number, page number, date, version (v1, v2) and who drew it at the top of every page, plus the aspect ratio in a corner so a photocopy still says it. What goes under each panel is covered further down.
How to storyboard if you can't draw
Nobody grades a storyboard on drawing. A panel works if someone else can look at it and tell you what the camera sees. Boxes, ovals and arrows are enough.
- Start with the frame in the right shape. Draw it at the ratio you'll deliver, or print a sheet with the frames already drawn. A wrong-shaped frame gives you compositions that won't work on the day.
- Draw the horizon line first. It always sits at camera height, so where it crosses your figures shows how high the camera is: through their eyes is eye level, at their knees is a low camera, above their heads is a high camera. Where it sits in the frame shows the tilt: across the middle for a level camera, lower for a camera tilted up, higher for one tilted down. Indoors, draw it lightly anyway; it keeps tables and walls in perspective.
- Draw heads as ovals and let their size set the shot size. In a close-up the oval fills most of the frame height. In a medium close-up you see the oval and a shoulder line. In a medium shot the body goes down to the waist. In a wide shot the whole stick figure is small and the setting takes over.
- Add a nose tick. A short line on the oval shows which way the face points, so you can see who is looking at whom and catch eye-line mistakes before the shoot.
- Use stick figures for bodies and boxes for things. A table is a rectangle, a cup is a cylinder, a car is a box with two circles. Label anything unclear with a word: "bus", "coffee", "timetable".
- Shade only what matters. A dark silhouette, a bright window, a pool of lamp light. Skip the rest.
- Show movement with arrows. Camera moves go on or outside the frame edge; people and objects that move get arrows inside it. For a push in, draw a smaller rectangle inside the frame where the shot ends. For a pan, a long arrow under the frame. For a zoom, small arrows in the four corners pointing in or out.
- Use two colors if you can. Conventions vary, so pick one color for camera moves and one for people (red for camera, blue for people is a common habit) and put the legend on the first page.
If drawing still feels slow, use photos: stand a friend in the location and shoot each frame on your phone with the grid on. Print them small or trace over them, and you'll also learn early whether the room is big enough for the shot.
Shot size, angle and movement: the shorthand
These are common abbreviations. Sources draw the lines between sizes a little differently (MCU and CU especially), so put a legend on your board and stick to it.
| Group | Term | Shorthand | What it means |
|---|---|---|---|
| Size | Extreme wide shot | EWS | Person tiny or absent; shows place or scale |
| Size | Wide shot | WS | Whole person plus a lot of setting |
| Size | Full shot | FS | Head to toe, little background |
| Size | Medium shot | MS | Waist up |
| Size | Medium close-up | MCU | Chest or shoulders up |
| Size | Close-up | CU | Face fills most of the frame |
| Size | Extreme close-up | ECU | Eyes, hands, a small object |
| Size | Two-shot | 2S | Two people in frame |
| Framing | Over-the-shoulder | OTS | Past one person's shoulder toward another |
| Framing | Point of view | POV | What a character sees |
| Framing | Insert | INSERT | Close detail cut into the scene: a note, a phone screen |
| Angle | Eye level / high / low | EL / HA / LA | Camera at, above or below eye height |
| Angle | Overhead | OH | Looking straight down |
| Angle | Dutch | DUTCH | Camera tilted on its axis, horizon on a slant |
| Move | Static | STATIC | Camera doesn't move |
| Move | Pan / tilt | PAN L/R, TILT U/D | Camera turns on a fixed base |
| Move | Push in / pull out | PUSH IN / PULL OUT | Camera travels toward or away from the subject |
| Move | Truck | TRUCK L/R | Camera travels sideways |
| Move | Tracking | TRACK | Camera travels with a moving subject |
| Move | Crane / jib | CRANE UP/DOWN | Camera rises or drops on an arm |
| Move | Handheld | HH | Held by the operator; visible motion |
| Move | Gimbal / Steadicam | GIMBAL / STEADI | Stabilized moving camera |
| Move | Zoom | ZOOM IN/OUT | Focal length changes; camera stays put |
| Sound | No sound recorded | MOS | Picture only |
| Sound | Voice-over | VO | Narration or a voice heard over the picture |
Two mix-ups to avoid. A zoom is not a push in: a zoom changes the framing but not the perspective, so the background doesn't shift the way it does when the camera travels. And the lens doesn't set the shot size on its own; distance does. A 50mm lens can give you a wide shot or a close-up.
What to write under the frame
The picture shows composition. The words carry everything else, so give every panel the same short set of fields:
| Field | What to write | Example |
|---|---|---|
| Shot ID | The number this shot keeps on the shot list and the slate | 2E |
| Size / angle | Shorthand from the table above | CU, low |
| Move | An arrow in the frame plus a word | Push in |
| Action | One sentence, present tense, only what can be seen | Cal sets down a coffee Nina didn't order |
| Dialogue / sound | Name and first words of the line, or a sound that matters to the cut | NINA: "That's all I have." |
| Continuity | Small facts that must match from shot to shot | Coat on. Three coins, left hand |
| Time | Seconds on screen | 4 s |
| Transition (optional) | Only if it isn't a plain cut | DISSOLVE |
Write the action as the audience will see it: "Cal sets down a coffee Nina didn't order", not "Cal feels sorry for her and decides to help." The script has the rest of the dialogue.
Timing the board
Give every panel a duration in seconds, then add them up. It's the step people skip, and the one that tells you whether the plan fits.
- Fixed-length spots (15, 30 or 60 seconds): the panel times must add up to that length. If they come to 41 seconds, cut shots now, not in the edit.
- Dialogue: read the line aloud at performance speed with a stopwatch, then add a beat on each side.
- Music videos: write the song section and track time next to each panel (Chorus 1, 0:45–1:15) so the shots line up with playback.
- Animation: time is often seconds plus frames, such as 2+12 (2.5 seconds at 24 fps). Write the frame rate on the sheet.
Once the board is timed, flip through the pages with a stopwatch running. It's a crude animatic, and it shows you which moments drag.
Choosing the aspect ratio
Draw at the shape your audience will see. The most common choices:
| Ratio | Also called | Typical use |
|---|---|---|
| 16:9 | 1.78:1 | Most online video, TV, YouTube, corporate and commercial work |
| 9:16 | Vertical | Reels, TikTok, YouTube Shorts |
| 2.39:1 | Scope, often called 2.35 | Short films and music videos going for a wide, cinematic look |
| 4:3 | 1.33:1 | A retro or archival look, some music videos |
- Vertical (9:16): apps lay captions and buttons over the bottom and right side of the frame. The areas differ by platform and app version, so keep faces and text well away from those edges.
- One shoot, two deliveries: if a 16:9 film also needs a 9:16 cut, draw the vertical crop as a dotted box inside each 16:9 frame. You'll see at once which shots don't survive the crop.
A 30-second example
The example is fictional: a 30-second sequence from Last Fare, three short scenes with two actors, shot in one night. Nina is a few coins short of the fare for the 11:40 night bus. Cal runs the diner across from the stop.
Here is the board in story order, eight panels:
| Shot | Size / angle | Move | Action | Dialogue / sound | Sec |
|---|---|---|---|---|---|
| 1A | EWS, eye level | Static | Night street. A diner window glows across from an empty bus stop. | Distant traffic | 4 |
| 2A | MS, eye level | Slow push in | Nina alone in a booth, coat on, counting coins. | Coins on the table | 5 |
| 2B | INSERT, overhead | Static | Three coins next to a bus timetable. Her finger stops on 11:40. | Room tone | 3 |
| 2C | MCU, eye level | Static | Cal behind the counter, watching her. | Radio, low | 3 |
| 2D | OTS over Nina | Static | Cal walks over and sets down a coffee. | CAL: "On the house." | 4 |
| 2E | CU, slightly low | Static | Nina slides the three coins toward Cal. | NINA: "That's all I have." | 4 |
| 2F | 2S, eye level | Pull out | Cal pushes the coins back and adds one more. Both look at the window. | Radio, low | 4 |
| 3A | WS, eye level | Pan right | Headlights turn the corner: the night bus. Title. | Bus brakes | 3 |
The total is 30 seconds. Going back outside after the diner makes a new scene (3), not more of scene 1. Drawn with the steps above, panel 2A is a horizon line through Nina's eyes, a table edge across the lower third, an oval head with a nose tick pointing down at three small circles, and an inner rectangle where the push in ends.
How to turn the storyboard into a shot list
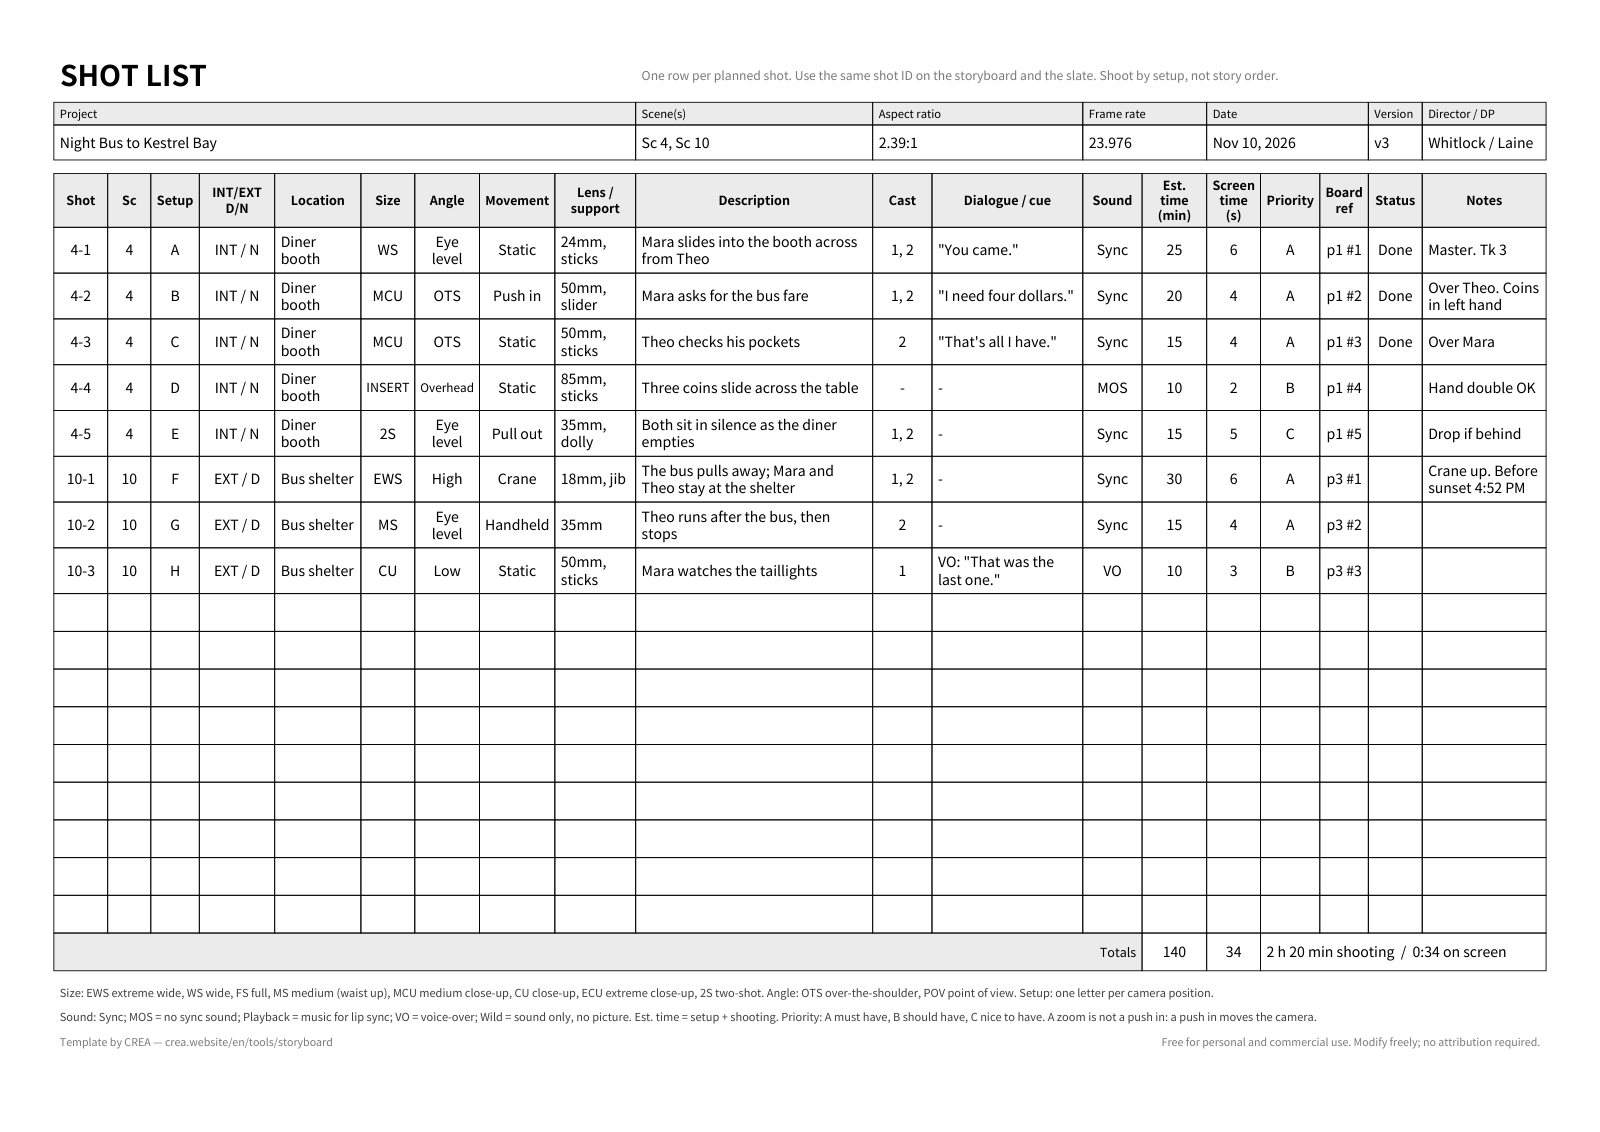
The board is in story order, but nobody shoots in story order. The shot list is where you re-sort the plan into the order that saves the most time, and add what the crew needs to prepare.
- Keep one shot ID everywhere. The ID on the board (2E) is the ID on the shot list, the slate and in the edit. US productions usually use the scene number plus a letter, often skipping I and O so they aren't mistaken for 1 and 0; UK productions often use running slate numbers. Agree on one system with whoever runs the slate.
- Copy each panel into one row: shot ID, scene, size, angle, move, description, cast, sound and notes.
- Add what the board doesn't show: lens, support (tripod, slider, gimbal), sync sound or MOS, and estimated setup and shooting time.
- Group shots by direction. Every new camera position is a new setup, but shots that face the same way under the same lights can be shot back to back with small lighting tweaks. Turning the camera around means re-lighting, and that is what eats the day. Number each direction.
- Mark priority. A is must have, B is should have, C is nice to have. When the day runs late, the 1st AD and director already agree on what to drop first.
A quick overhead sketch of the room helps with step 4. Number each camera position and draw a line between the two actors that the camera stays on one side of (the 180-degree line). The grouping becomes obvious, and screen-direction mistakes show up before the shoot.
The example has five directions: (1) Nina in the booth, (2) Cal and the counter, (3) a side-on two-shot, (4) the table from above, and (5) across the street. Here is its shot list in shooting order, with the action and cast columns left out because they're copied from the board:
| Shot | Dir. | Size / move | Lens | Support | Sound | Min | Priority | Notes |
|---|---|---|---|---|---|---|---|---|
| 2A | 1 | MS, slow push in | 35mm | Slider | Sync | 35 | A | Coat on; coins in left hand |
| 2E | 1 | CU slightly low, static | 85mm | Slider, locked off | Sync | 25 | A | Three coins |
| 2C | 2 | MCU, static | 85mm | Tripod | Sync | 20 | A | Radio off for takes; add in post |
| 2D | 2 | OTS over Nina, static | 50mm | Tripod | Sync | 30 | A | Coffee cup: hero + spare |
| 2F | 3 | 2S, pull out | 35mm | Slider | Sync | 35 | A | Fourth coin from Cal's apron |
| 2B | 4 | INSERT overhead, static | 50mm | Overhead rig | MOS | 25 | B | Timetable shows 11:40 |
| 1A | 5 | EWS, static | 24mm | Tripod | Sync | 25 | A | Diner sign lit |
| 3A | 5 | WS, pan right | 35mm | Tripod | Sync | 35 | A | Leave room for the title |
The exteriors go last because the borrowed bus is only free after 10 PM. 2B goes last inside because it's priority B: if the interiors run long, it's the shot to drop to make the bus window, and the coins in 2A already tell the story. And 1A and 3A are different scenes shot from almost the same spot, which is exactly why you re-sort.
How the shot list feeds the schedule and the call sheet
- Scene breakdown (script breakdown). This comes first, straight from the script: each scene's cast, props and wardrobe. Boarding turns up details the script never mentions, so check the shot list against the breakdown and add what's missing. Here the board added a bus timetable, a coffee cup and a fourth coin to scene 2's props; the script had already given you the three coins and Nina's coat.
- The day's running order. Add up setup and shooting times in shooting order from crew call, and slot in the meal break and any company move. That's your timed plan for the day: a day schedule, or what CREA calls a rundown.
- Call sheet. The call sheet lists scenes in shooting order with INT/EXT, day or night, cast and location: Sc 2 INT. DINER – NIGHT first, then Sc 1 and Sc 3 EXT. STREET – NIGHT. Each actor's call time works back from the first setup they're in, allowing for hair and makeup.
The full walkthrough of the call sheet itself is in How to make a call sheet.
Free sheets to print
- Storyboard sheets, A4 PDF, one aspect ratio per file: 16:9 · 9:16 vertical · 2.39:1 · 4:3
- Shot list, Excel (.xlsx), with a blank sheet and a filled example. It also opens in Google Sheets, Numbers and LibreOffice; formatting may shift slightly.
The PDFs are A4. On US Letter paper, print with "Fit to page" (about 94%) so the edges don't get cut off. All files are free for personal and commercial use and may be modified; attribution is not required. Previews of every file are in Free storyboard and shot list templates.
Keeping the board and shot list together in CREA
If you'd rather not keep paper and a spreadsheet in sync, CREA's free shot list tool keeps the board and the list in one table:
- Rapid boarding: type one line per shot and press Enter. Shot numbers count up on their own (2A, 2B); add size, move and lens later.
- Sketch pad at the project's frame shape (16:9, 2.39:1, 1:1, 4:5, 3:4 or 9:16; no 4:3, so use the paper sheet for that), with thirds guides, a photo underlay to trace, and black, red and blue pens for frame content, camera moves and people. It works with an iPad and Apple Pencil.
- Animatic: plays the frames in order, each for its duration. Preview only, no video export.
- Shared data: the shot list shares scenes with the scene breakdown. Give a shot a shoot day and it joins that day's rundown, and a call sheet dated that day takes its scene list from there. Each tool page's start button opens its own project, so start once and switch tools from the bar at the top of the editor.
- PDF: a landscape A4 shot list with the reference and storyboard frames in their own columns.
The tools need a free account; your crew can read a published call sheet without one.
On paper or on screen, the method is the same: draw the frame, time it, re-sort it by camera direction, and let the schedule come out of the list. When you want all of that in one place, start a shot list in CREA.